

 Current
Location:
HENG MEI Intelligent Manufacturing Handheld Density Meters for On-Site Liquid Checks
Article Source: Hengmei Technology Release time:2026-11-13 13:32:03
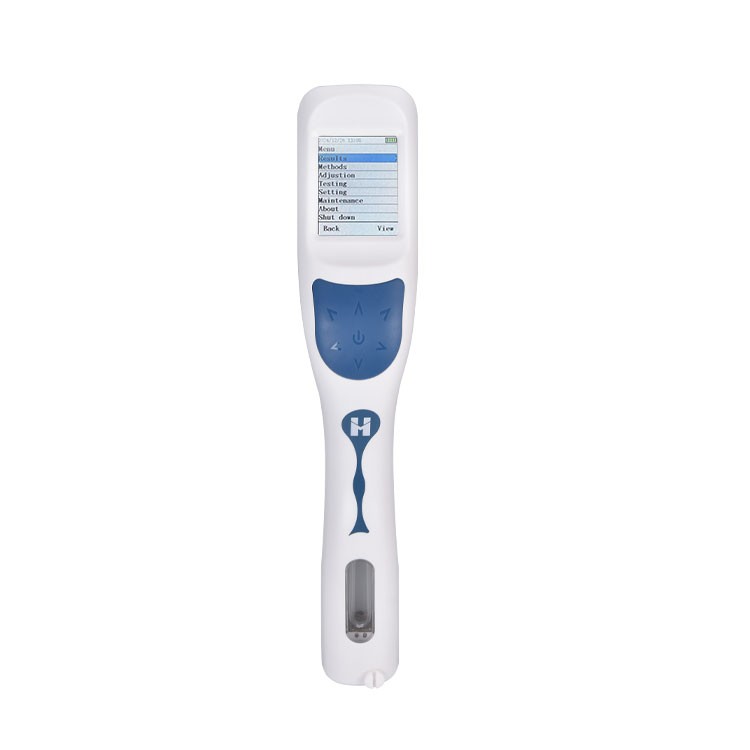
A handheld density meter suits on-site liquid checks when its sample-contact materials, temperature range and analytical accuracy match the task. HM-DS weighs approximately 350 g and uses an internal pump for small-volume sampling. Plan reference checks and cleaning supplies alongside the instrument.
HM-DS is part of the HENG MEI Intelligent Manufacturing range supplied by Shandong Hengmei Electronic Technology Co., Ltd.
How the measurement works
The HM-DS handheld density meter introduces liquid into an oscillating U-tube through an internal pump. It measures density and temperature and stores identified results for later transfer. Consistent filling and cleaning support a practical field measurement sequence.
Build a field kit around the sampling route
Plan the liquids to be checked and the order of visits. Bring compatible sample containers, reference liquid, cleaning supplies and the power accessories needed for the route. Agree on sample identification before work starts. Where immediate printed reports are required, include the optional Bluetooth printer in the ordered configuration.
Technical configuration
| Parameter | Specification |
|---|---|
| instrument mass | 350 g |
| Typical pumped volume | Approximately 1.0–2.3 mL |
| Local storage | 1,000 historical records |
Estimate the liquid needed for repeated field checks
With an approximate 1.0–2.3 mL pumped volume, three fillings require about 3.0–6.9 mL before rinsing or transfer losses. Allocate additional sample according to the actual cleaning and repeat-measurement procedure. Keep a separate allowance for reference checks so the field schedule can be completed without compromising the sample plan.
Keep field results reconstructable
Record density with temperature and any selected compensation or concentration formula. Use barcode, QR or NFC identification consistently where those functions are part of the workflow. Before returning from the route, check that the saved sample IDs correspond to the containers and export the records through the agreed data process.
Complete an on-site route with usable records
For a route covering several tanks or product lines, assign sample identifiers before drawing liquid. Choose an order that fits the approved cleaning process between products. Check the instrument at the required points in the route and keep the reference result with the field records. If a filling problem or unexpected value occurs, record the observation and corrective action alongside the original reading. At the end of the route, reconcile instrument records with the sampling list and transfer them to the agreed storage location. This reduces ambiguity when production or quality staff later compare the on-site measurements.
Put the selected method into practice
- Assign the sample ID and check the instrument with the prescribed reference material.
- Introduce the sample, watching for incomplete filling or trapped bubbles.
- Measure under the accepted temperature conditions and save the result.
- Clean the fluid path before moving to the next liquid and export the field records.
Plan support for common operating issues
| Operating issue | Checks and follow-up |
|---|---|
| Filling is incomplete | Check the intake path, sample availability and the approved pump-handling procedure. |
| Readings change between products | Review cleaning and the possibility of residual liquid in the measurement path. |
| A saved result has the wrong identity | Review the scan or entry step and preserve the correction history. |
Plan the complete working configuration
Assess the liquid chemistry and ease of filling before choosing a field procedure. Pack the required calibration liquid, cleaning materials, sample containers and power accessories. Decide how samples will be identified and how records will be transferred at the end of the shift. The Bluetooth printer is optional.
Define the acceptance and reporting requirements
Agree on the following items when configuring HM-DS. They connect the equipment and consumables to the intended measurement and provide a basis for operator training and result review.
- Field location and sample ID
- Density and measured temperature
- Compensation or calculation setting
- Reference check and data-transfer status
Questions from buyers and laboratory teams
Is the Bluetooth printer included as standard?
The Bluetooth printer is optional.
What information should travel with a field result?
Keep sample ID, density, temperature, correction settings and reference-check status together.
For a HM-DS configuration enquiry, provide the sample type, required measurements, expected workload and reporting requirements. Include the consumables, preparation equipment and support arrangements needed at the installation site.
Address of this article:https://www.kjhm.net/news/handheld-density-meters-for-on-site-liquid-checks.html
 Related News
-
13 / 2026-11
HENG MEI Intelligent Manufacturing Choosing an Automatic Potentiometric Titrator
Learn more
-
13 / 2026-11
HENG MEI Intelligent Manufacturing Choosing an ATP Hygiene Luminometer
Learn more
-
15 / 2024-10
Intelligent Environmental Monitoring: Analysis Of The Advantages Of The New Air Planktonic Bacteria Sampler.
Learn more
-
15 / 2026-06
FAQ: Full-Wavelength Microplate Reader Technical Questions Answered by HM Instruments Experts
Learn more